Take the Best Product Photos
Great photos sell products. We don’t have to tell you twice.
But can you really get awesome product photos without fancy equipment and spending a fortune? Of course you can, especially with these insider tips.
Pick the right camera
You don’t need the best camera money can buy to take great photos. Sure, it seems the camera with the most bells and whistles will produce a better photo, but the fact is almost any camera can take a perfect shot.
You just want a digital camera with at least a 4-megapixel capability. Megapixels translate to image quality when a photo is viewed at a larger size. You really don’t need anything above 4 megapixels unless you plan on making posters or billboard signs. It’s also good to have a camera with manual settings and portrait, landscape, white balance and focus controls.
Then add a tripod, 2 or 3 dedicated lamps and something white to your studio, and you’re off to a great start.
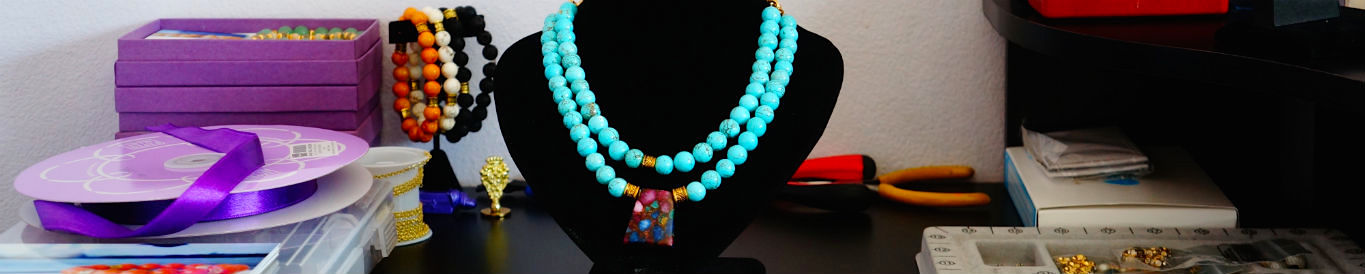
Perfect the setup
Your “something white” depends on how and where you want to set up your shot. You can use a plain, white cloth of some sort and hang it on the wall, or purchase poster board to use as a background. Generally, what you’re aiming for is a clutter-free background with a clean, professional appearance.
There are also affordable studio light boxes available, or you can make your own with a cardboard box and tissue paper.
If you’re taking pictures indoors, place a lamp on each side of your product, and another one above it. With the lights on, adjust their positions until shadows are washed out as much as possible.
But most photographers will tell you that natural lighting is always the best option. You can get this light from a window source, overcast or open shade outdoors, or take advantage of beautiful morning and dusk lighting.
Just try to keep harsh lighting out of the picture. To do this, create a setup that doesn’t have really bright light and really dark shadows in the scene.
Take the shot
Now you’re ready to point and click.
Secure your camera on a tripod to avoid blurry results. Following the rule of thirds, position your viewfinder to take an overall shot of your product, and also zoom in to get some close ups. Most cameras allow you to hold the button halfway down so it can get a good focus on your setup. Don’t bother taking the picture until you know there’s no blur.
Take photos of your product from different angles; high, low, from the left, from the right, etc. When you go to select photos for your listings later, you’ll find that some are more visually appealing than others based on the angle.
Fine tune your images
A professional photographer knows his craft so well that he shouldn’t even need to use photo editing software to adjust his images. Online sellers, on the other hand, might appreciate a little extra help.
Adobe Photoshop is fun, but expensive, so do a little research and you can find free and low-cost alternatives. Just make sure the editing program you choose lets you crop your photos and adjust color, tone, brightness, and image size.
Just make sure your final images represent your product well and don’t misrepresents the item.
Like this article? Find even more helpful tips on Auctiva EDU.

